(Deutsche Version) It's been now over a year since the last post and I did lots of projects, especially with the multi-colour upgrade for my Ultimaker 2+. Today, I want to share a project that is part of this, but also part of my IoT Home Automation system: A (two) camera based surveillance for my 3d printer with automated recognition of states.
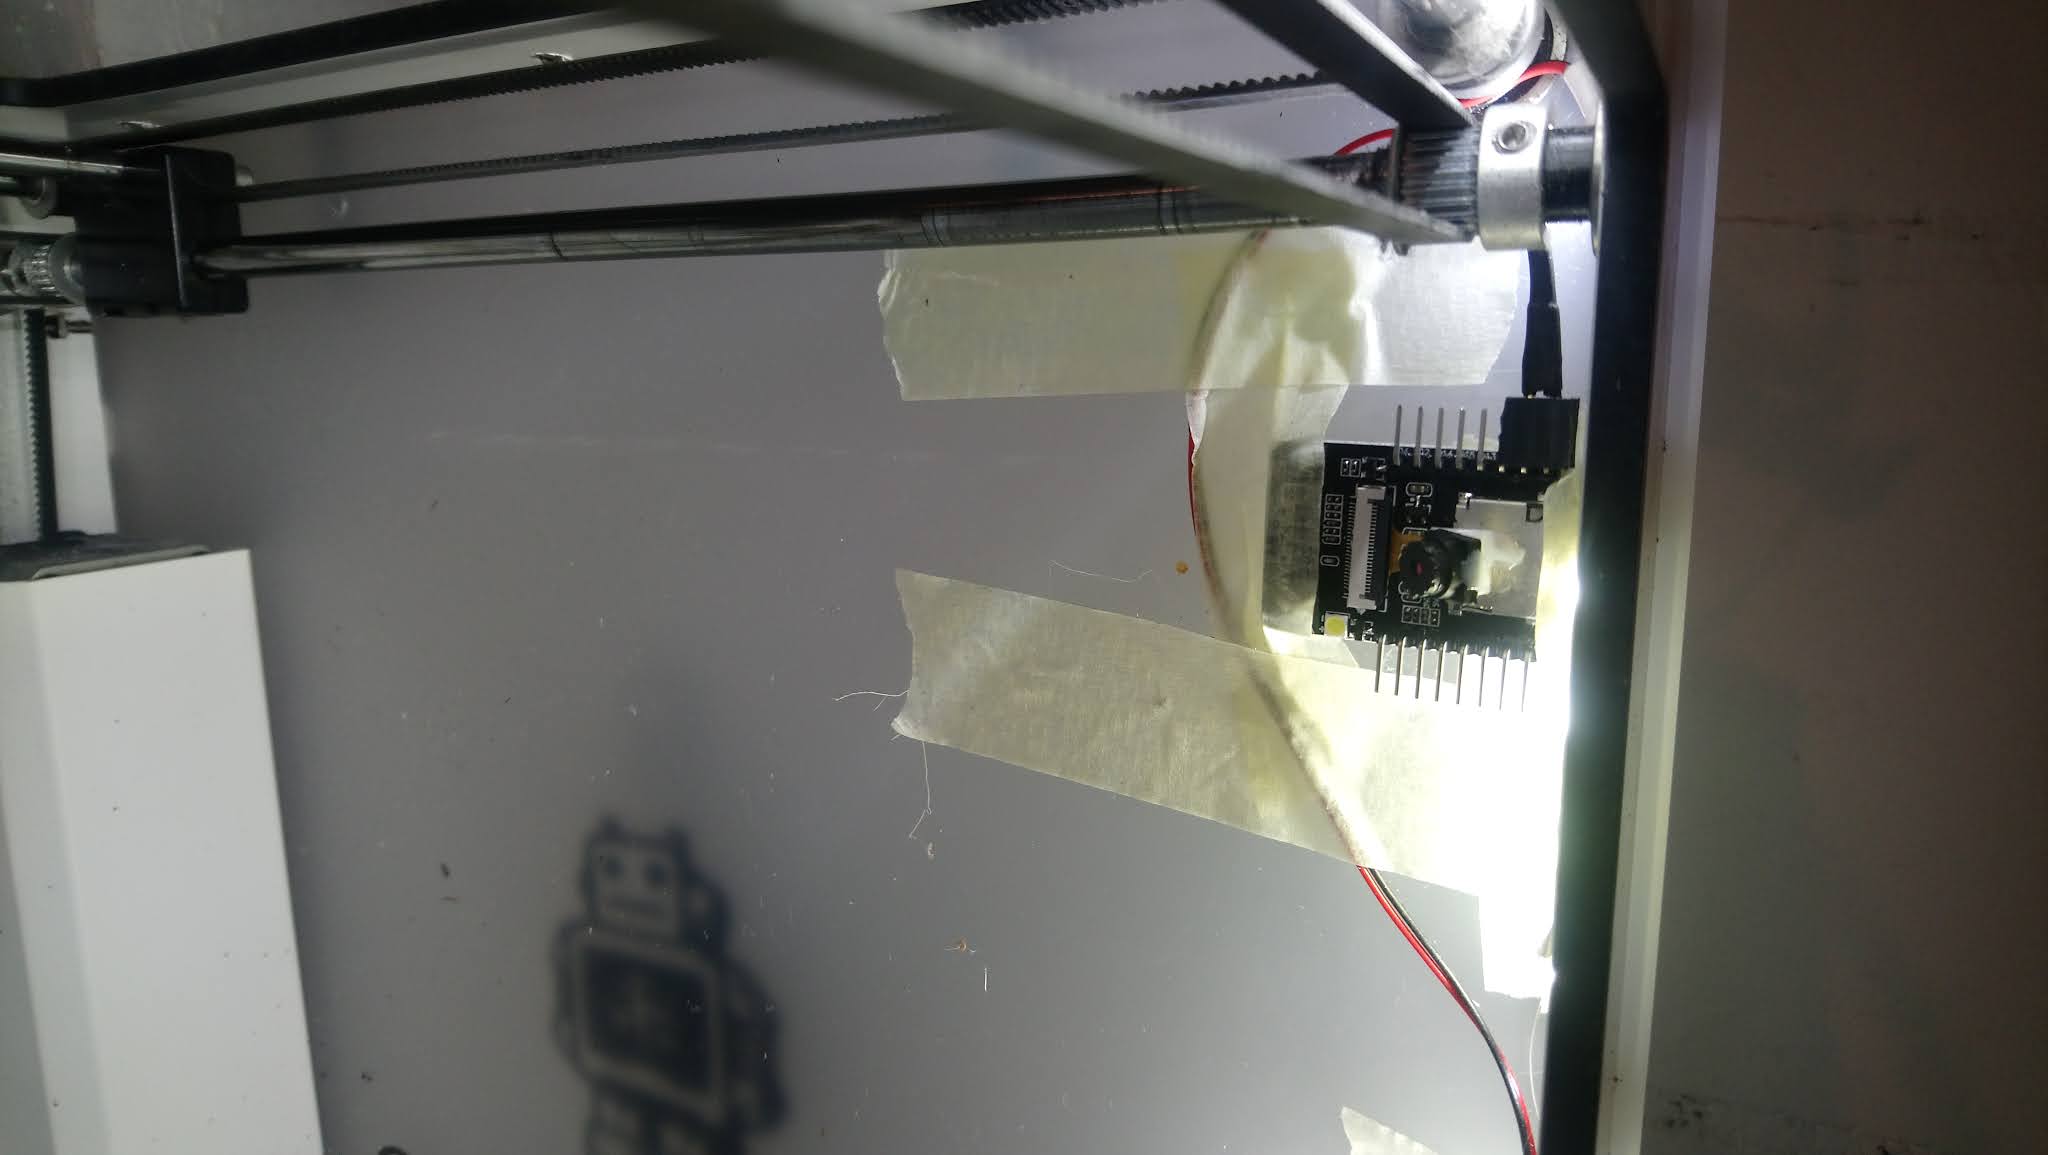
First of all: the cameras. I have two ESP32-Cam modules where you can find endless tutorials on the internet on how to program these. I then added them to my 3d printer. The first camera is on top, with a 3D-printed fixture you can find here: https://www.thingiverse.com/thing:3899159

The second camera is placed in the 3D printer with tape, and I slid a 45° block below the camera module to get the right angle.
These cameras produce a new image roughly every 3 minutes, so I have a lot of training data by now. The images look like this:


The images can be classified into different categories:
- Idle: The printhead is in its parking position and the printbed is empty
- Preparing: The printhead is in the front left position and the printer is heating up
- Printing: I don't really have to explain this I guess
- Finished: The printhead is in its parking position and the printbed is not empty
- Problem: A distance between the printbed or the current object and the nozzle is visible
- Maintenance: My hands are in the printer, the printhead is disassembled or not in its parking position
- Off: All lights are switched off and the image is only dark
Camera 1 can't really decide whether it's printing or problem, so this camera cannot detect "problem", camera 2 can't distinguish between idle and finished, so this camera cannot detect "finished".
I sorted the first images I had into the 7 categories and then trained a neural net on them. My architecture of the net (in Tensorflow, Python) looks like this:
model = models.Sequential()
model.add(layers.Conv2D(32, (5, 5), activation='relu', input_shape=(128, 128, 3)))
model.add(layers.MaxPooling2D((2, 2)))
model.add(layers.Conv2D(32, (3, 3), activation='relu'))
model.add(layers.MaxPooling2D((2, 2)))
model.add(layers.Conv2D(32, (3, 3), activation='relu'))
model.add(layers.MaxPooling2D((2, 2)))
model.add(layers.Conv2D(32, (3, 3), activation='relu'))
model.add(layers.MaxPooling2D((2, 2)))
model.add(layers.Conv2D(32, (3, 3), activation='relu'))
model.add(layers.MaxPooling2D((2, 2)))
model.add(layers.Flatten())
model.add(layers.Dense(64, activation='relu'))
model.add(layers.Dense(7))
It is designed for the input of 128x128 pixel images with 3 colours and consists of 5 convolutional layers, each with a max pooling layer afterwards and then one fully connected layer with 64 neurons which leads to the output layer with 7 neurons.
To further optimise the detection, I added a second net that uses images of the input 64x64 pixels and thus has only 4 convolutional layers. The result percentages for each category of the two nets are added (and divided by 2), which increases the accuracy. In the end, this result is obtained for both cameras and again added, furthermore there is a microphone inside the printed which measures the noise level and can distinguish whether the printhead fan is on or off and thereby delivers another input. The total results then creates a forecast for the status of the printer. As described in the previous post, this status is then sent to my IoT system which alerts me if
- The printer status changes to "Problem"
- The printer status changes to "Finished"
No comments:
Post a Comment